Published: 5 December 2016
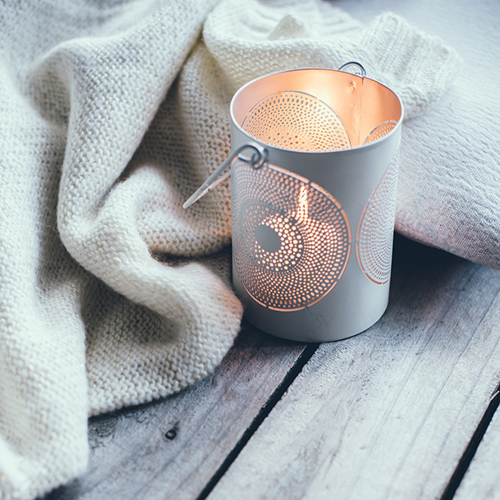
There's a real trend for home-made personalised gifts this year, so why not get involved? They're thoughtful, fun to make, and could save you some money too. Here are 6 ideas to get you started.
1. Knit a blanket
There's nothing better than a cosy blanket at this time of year. Use this simple pattern to make your very own.
To make this blanket, you'll need:
7x 200g balls of wool
10mm needles
How to knit this blanket:
1. Cast on 40 stitches
2. Knit 4 purl 4 until you get to the end of the row
3. Keep going until you're happy with the length
4. Cast off 40 stitches
And you're done!
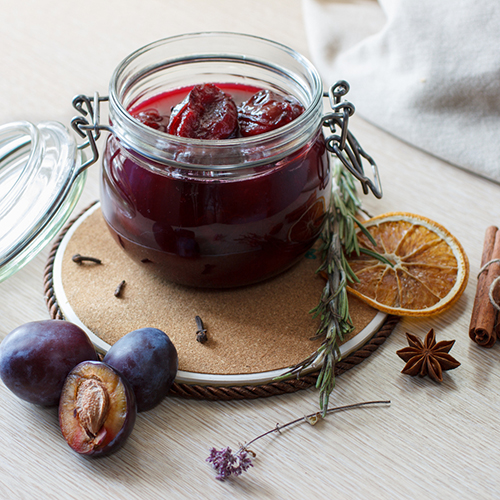
2. Festive jam
Prep time: 15 minutes
Cooking time: 30 minutes
What you'll need:
1 cinnamon stick
A few whole cloves
450g cooking apples, peeled, cored and diced
Zest of 1 large orange
200ml orange juice
900g cranberries
900g granulated sugar
Here's how you make it:
Put the cinnamon, cloves, apples, orange zest and orange juice in a big pan. It's a good idea to tie the cinnamon and cloves together in a small piece of muslin first.
Once the apples are soft - this should take around 10 minutes - throw in the cranberries. Simmer until the cranberries are soft. This will take 5-10 minutes.
Slowly pour the sugar into the mixture. Stir constantly until all the sugar has dissolved, then turn up the heat and boil the mixture for 10 minutes. Next, take out the muslin bag and throw it away.
Take the pan off the heat and spoon a little bit of the mixture onto a cold plate. Wait for 2 minutes, and then push your finger through the jam. It should wrinkle. If it's still runny, boil the mixture again for a few minutes then test it again.
When it's done, leave the jam for 10 minutes, and then skim off any scum from the top. And you're done - just pour the jam into jars and seal them up.
3. A mint sugar scrub
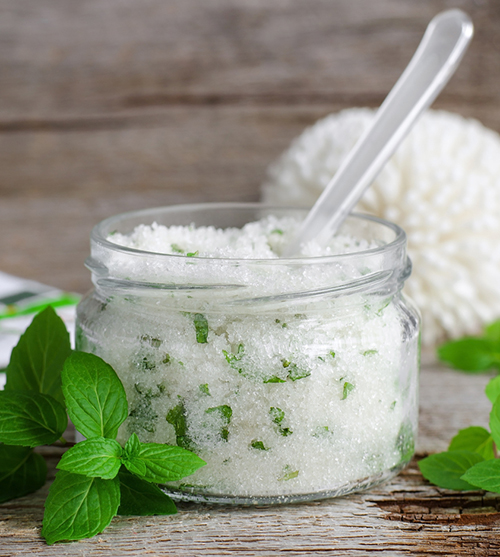
Sugar scrubs make a great gift, and they're also really easy to make.
To make this, you'll need:
170g coconut oil
500g sugar
1 tbsp peppermint extract
1 drop of green food colouring
Here's how you make it:
Put the coconut oil in a bowl, and then put the bowl in a microwave. Heat it until it softens - this should take about 20 seconds.
Pop the sugar, peppermint extract and food colouring into the bowl, and mix it all together. The ingredients need to be thoroughly combined, and the food colouring needs to be evenly mixed throughout. If your mixture is too wet, add a little bit more sugar until you get the right consistency.
And that's it! Distribute the mixture into air-tight containers, and decorate those containers however you like.
We've used a mint sugar scrub as an example, but you can use a range of different ingredients. Get creative and try out a few recipes of your own.
4. Candles
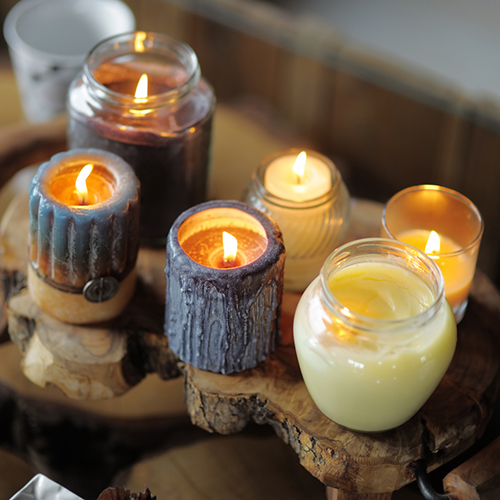
To make your own candle(s), you'll need:
Wax flakes
Pre-waxed candle wicks
A non-toxic wax crayon, for colour (optional)
Essential oils (for scent, optional)
Saucepan
Glass container
Here's how you make it:
First, measure out the candle wax flakes you'll need. This should be twice as many wax flakes as you need to fill your container(s).
Once you've measured the wax flakes, put water in a saucepan until it's half full. Then place your wax flakes in a separate container made of glass.
Put the glass container inside the saucepan. Heat the saucepan, stirring the wax flakes occasionally.
The next step is to add colour to your candles. You don't have to do this. If you're happy with the natural milky white colour of the wax, you can skip this step.
If you do want to change the colour, add some of the wax from a non-toxic wax crayon to the mix. The more crayon wax you throw in, the brighter the colour will be, so gradually add little bits of wax (from the crayon) until you're happy with the colour. Note that the colour will be much brighter in the mixture than it will be when the candle cools.
The next step is to add the essential oils to give the candle a scent. It's a good idea to use about 10 drops of oil for every 500g of wax, but you can adjust this if you prefer a stronger/weaker scent. When you've added the essential oil, stir the mixture to make sure the scent is thoroughly mixed in.
Then you need to pour the wax into your container. But the candle wick has to be standing when you do so. Use one hand to keep the wick standing up straight, and carefully pour the wax the with the other hand.
Leave your candle to set at room temperature. This normally takes between three and four hours.
5. Leather phone case

To make this, you'll need:
1 clear acryllic phone case
Leather
Glue
A craft knife
Here's how you make it:
Cut out a piece of leather slightly bigger than the outside of the phone case.
Cover the outside of the phone case with glue, and then press the outside of the case onto the back of the piece of leather.
Hold the leather in place while the glue dries - it shouldn't take too long.
When the glue is dry, cut out a space for the phone's camera, and cut off the excess from around the outside.
Cut a small triangle from each corner, and then glue the corners to the edges of the phone case.
Once all the glue is definitely dry, attach the phone to the phone case.
6. Pressed flowers
A framed arrangement of pressed flowers can be an excellent gift, and it's a great chance to show off your creative side too.
Here's how you do it:
Collect your flowers. You might be able to get them from your garden, or you might have to go and buy them.
Open a big, heavy book to the middle. Place a napkin or piece of paper on the page.
Lay your flowers out on the napkin, carefully close the book, then add some extra weight on top of it.
Leave the flowers to dry out. Ideally, you should leave them to dry for at least a week.
Prepare your frame: You could make your own, buy them in shops, or buy them and paint them a different colour. White frames are great for pressed flowers, but you can use whatever you like.
Carefully unfold the napkin to reveal your dried flowers. Then you need some backing paper. Most frames will come with backing paper, but you can also cut out your own.
Arrange your flowers on the backing paper (very carefully), then attach the frames.

